"Chunk Gun Adapter": (Note: I understand there are some Chunk Gun Associations do not allow this adapter to be used on rifles in competition. Therefore, check with range officials prior to entering. According to my friend "Pack Dog", who got a copy of the 2005 Sgt. York Rules, it states: (*SPECIAL NOTE, Shooting chunks should be flat on top. Grooves in the chunk that hold or cradle the rifle are going too far. Build a cant block that clamps to the rifle and set it on top of the chunk. The rifle (with the cant bar) should be able to slide side to side and back and forth on the chunk. No more grooves or rails on the chunk!) Therefore, it would be legal at the Sgt. York Shoot. Alright! Thanks, Pack Dog!
First you need a good piece of wood
and cut it down to make an elongated block of wood. I made mine from from some
scrap walnut I had in the shop. The piece measured 3" square and
6" long. 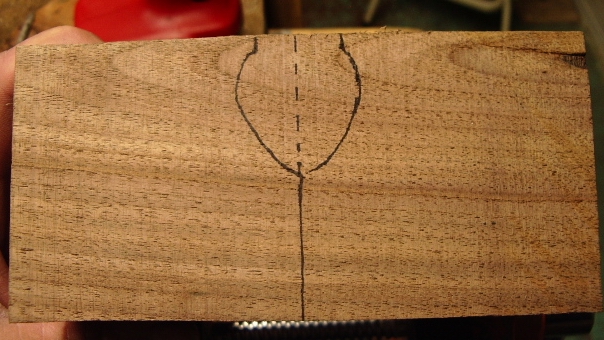
I found center in the block and marked it. Then I used a wire profile tool to get a profile of my rifle (Re-Becka). I wanted to have to block of wood be positioned right behind the front thimble of the rifle, so I took my profile measurements from there.
Before I did anything else, I knew I had to hold the two halves together with a bolt thru the two pieces after I cut it apart. So at this point, thought it justified to drill my hole thru the whole block of wood. I drilled 1/4" hole thru the end of the block of wood.
This hole was drilled 1" up from
the base and half way across the width of the block. This allowed sufficient
clearance to miss the rifle and yet be high enough to give stability to the adapter
after it is mounted onto the rifle.
Then I used a 5/8" spade
bit to drill out a 1/4" 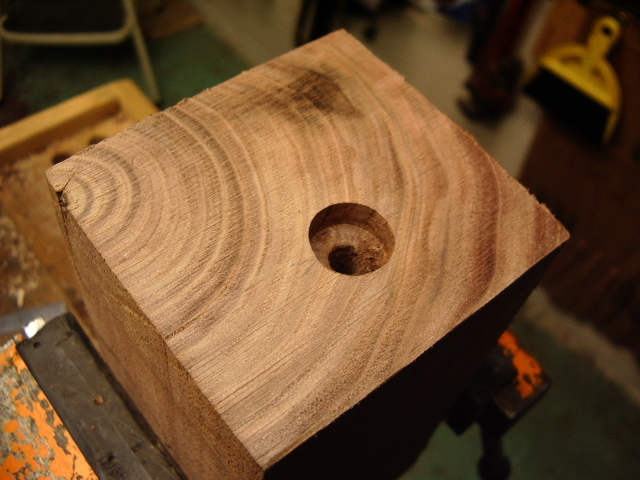 deep
recesses for the washer and nut that would go onto either end of the
block.
deep
recesses for the washer and nut that would go onto either end of the
block.
To test the depth, I placed my
threaded 1/4" rod with a nut attached with a washer into the hole.
You can always drill it deeper, depending on the type of attachment you have in
mind. 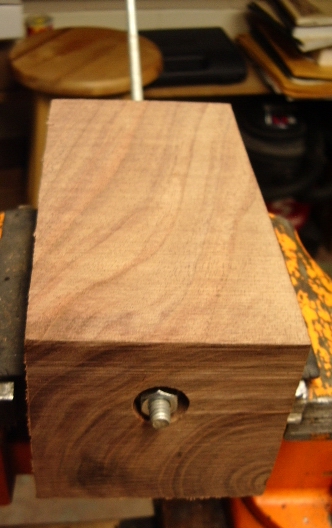
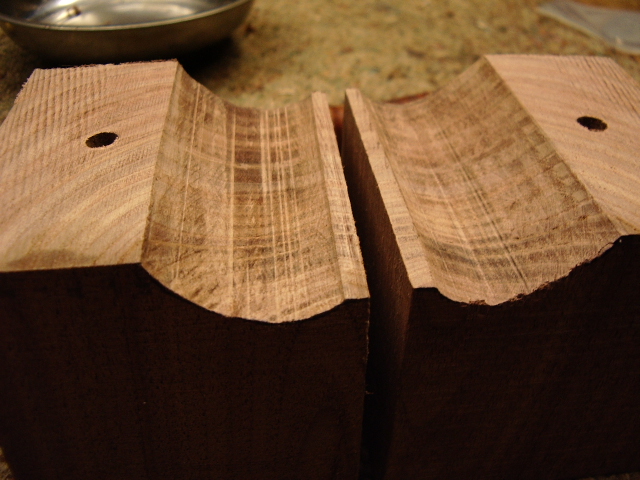
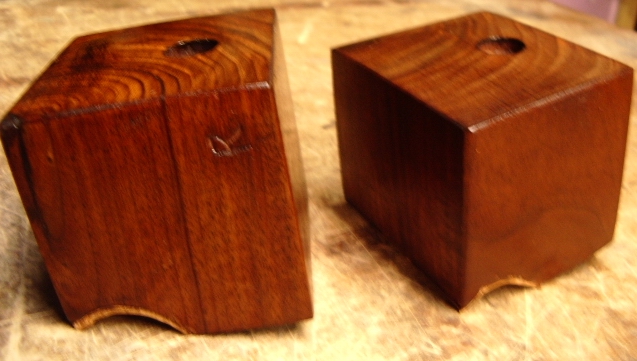
Now comes the fun part. You cut the
block in half.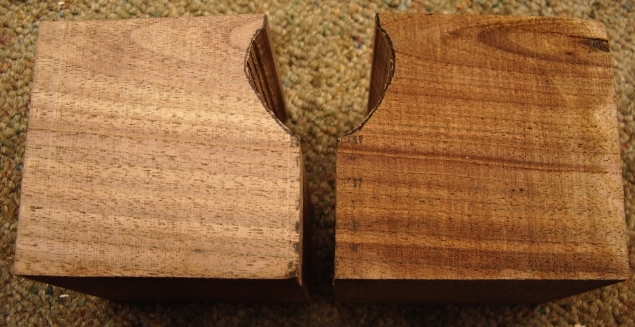 Then I used the band saw to cut away the excess material inside the profile
area.
Then I used the band saw to cut away the excess material inside the profile
area.
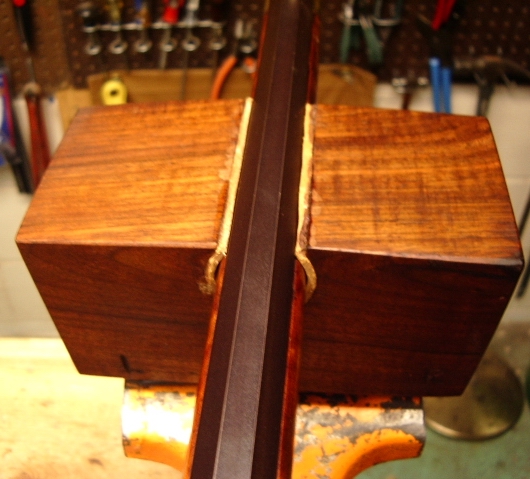
I then used a curved scrapper and a round file to remove the ridges created by the band saw to make a smooth inner surface.
Once the inner surface was smoothed out, I
gathered up a couple pieces of soft leather to line the inside of the adapter,
so the gun stock does not get damaged when the adapter is attached. 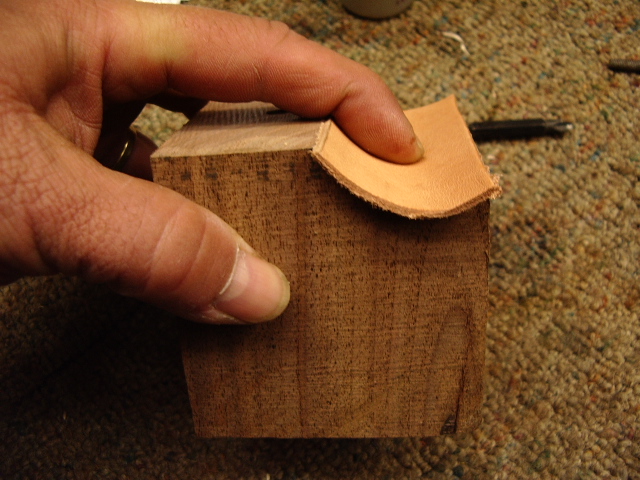
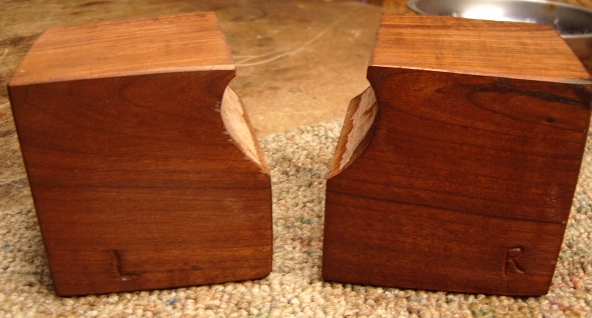 Then I reckoned it would be best to go sand down the pieces of wood and clean
them up. After this was done, I applied a coat of oil to the blocks. Note,
I carved each block with a "L" and a "R" so I know this is
the rear side of the adapter blocks.
Then I reckoned it would be best to go sand down the pieces of wood and clean
them up. After this was done, I applied a coat of oil to the blocks. Note,
I carved each block with a "L" and a "R" so I know this is
the rear side of the adapter blocks.
Once this dried, I then glued the pieces of
leather into the profile areas of the blocks. 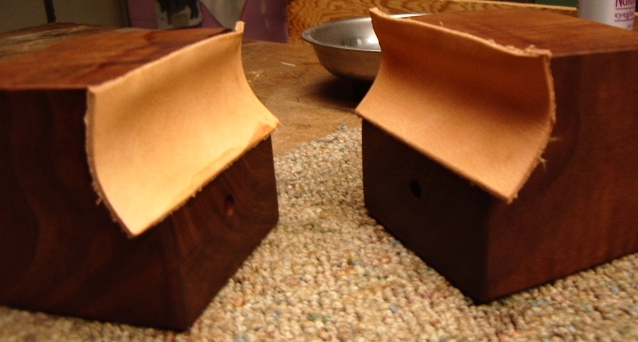
Then using a razor bladed knife, I cut the leather flush with the wood.
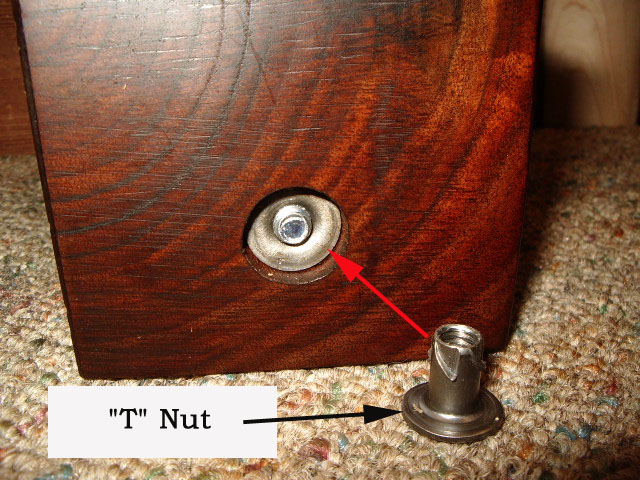
Now I'm working on the threaded bolt, nuts and washers.
I used a 6" pan headed bolt and a "T" nut for insertion into the end of the other block.
I used a lock washer with a flat washer under the pa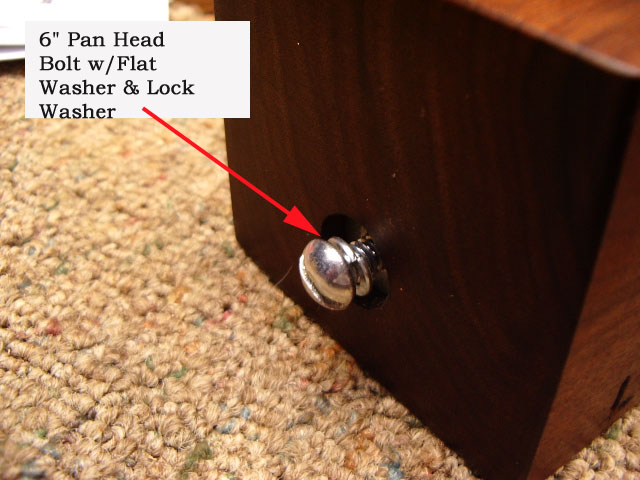 n
head of the bolt.
n
head of the bolt.
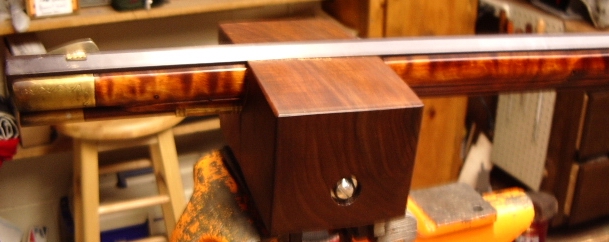
Here are some photos of the block mounted to the rifle.


Hoot AL Rifle Shop
If you like the site or have any questions, drop me a line by clicking on "Hoot" below.

(c)
Copyright 2005. All Rights Reserved.