 This
works for those of you who have small drill presses like me. This is a short jig
that allows you to center the drill bit and have sufficient room for both the
drill bit and the gun. With the drill bit in the chuck, lower the drill
bit and then center the lower pin in alignment with the drill bit. Now you can
drill a 1/8" hole from the top down to meet the pin below. You drill
half way down, flip the gun upside down and drill from the other
direction. Now change the bit over to a #29 for a #8 or a #21 for a #10
tang bolt and open up the hole more. The initial hole drilled serves as a pilot
for your bit. Works great!!
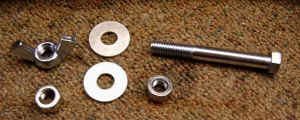
To make the lower jig, I purchased the following parts from the local hardware store.
| Quantity | Description | Specifics |
| 1 | Hex Head Bolt * | 7/16"x3-1/2" -14 thd |
| 1 | Hex Nut | 7/16" - 14 thd |
| 1 | Wing Nut | 7/16" - 14 thd |
| 2 | Fender Washer | 1/2" ID- 1-1/4" OD |
* Make
sure the bolt you get has at least 1-3/16" amount of threads. This will
allow enough threads to pass thru the drill platform, the washer and the wing
nut. 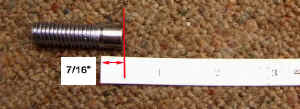
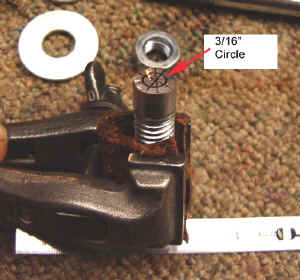
Measure up from the threads 7/16" and draw a line. You will cut off the bolt here.
Then you will find and mark the center of the
bolt shaft diameter. With the center located, draw a 3/16" circle centered
on the end of the bolt shaft. 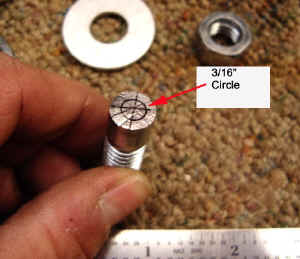
This will be the initial diameter you will grind the bolt shaft down to. Place the bolt into a small vise to make it easier to handle the bolt during this process.
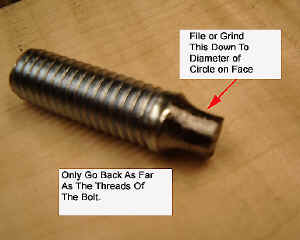 All you want to do at this point is to remove
the majority of material, almost to the threads.
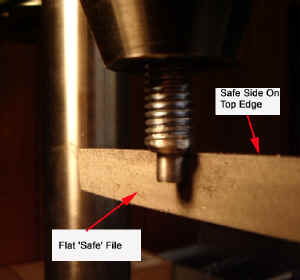
Once this is done, then chuck the bolt into your drill press and using a 'safe' file. Work the file into the side of the bolt gradually to both square the shoulder near the threads and also reduce the diameter of the smaller shaft down to the 3/16" diameter.
Once you have reached the diameter, you can
now file the point on the end of the bolt shaft. I used a bastard file to shape
the point. The depth of the point was half the length of the shaft. 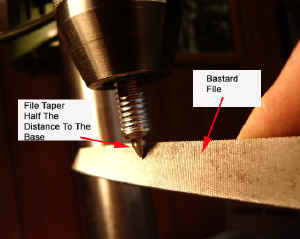
I did not make a sharp point on the end, but rather left a small flat on the end.
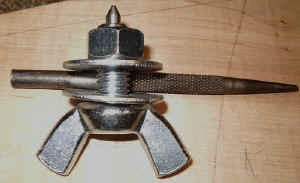
Next
I threaded the 7/16" nut onto the threaded bolt all the way to end of the
threads toward the point. Place a washer onto the bolt and inserted the
jig down into the hole in my drill platform.
From the bottom, I placed another washer and then the wing nut onto the exposed threaded portion of the jig.
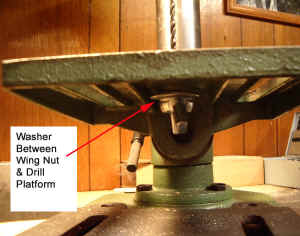 The
fender washers cover the platform hole and yet the diameter of the bolt allows
for movement and adjustment of the jig location to
 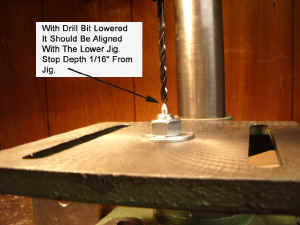 align
with the drill bit.
Once the jig is located where you want it, you can use a crescent wrench to hold the top nut and allow tightening of the lower wing nut.
Hoot AL Rifle Shop
